Westergard Home: Pantry Reveal + Organizing Tips
This reveal is one I have been looking forward to sharing with you! Shalae Price from AZ House of Order stopped by to make my pantry beautiful, organized, and completely functional. There are so many aspects of having a functional pantry that I didn't think of and wouldn't have if I didn't have Shalae's help!
I asked Shalae some questions after she transformed my pantry so I could share with you all the tips and tricks to make your pantry beautiful and functional as well!
What is the first step when organizing your pantry?
The very first thing we do before organizing a pantry, is take measurements of the shelves, drawers and cabinets – so that we can shop for bins, baskets, turntables, and other organizing products that will fit appropriately. Having plenty of the RIGHT products is something you will want to have in your home on organizing day! (By the way, we always buy way more than we think we will need, so that we have plenty of options to choose from as we play around with the placement of things as we organize. We make returns afterward.)
On the day of organizing, the very first thing we do is to take EVERYTHING off the shelves and move it all out of the pantry. Doing this will allow your mind to see the different possibilities, it will force you to touch every item that has been sitting in your pantry (and purge expired / unwanted food), and it will also allow you to give the shelves a good cleaning!
What storage bins/containers do you recommend and why?
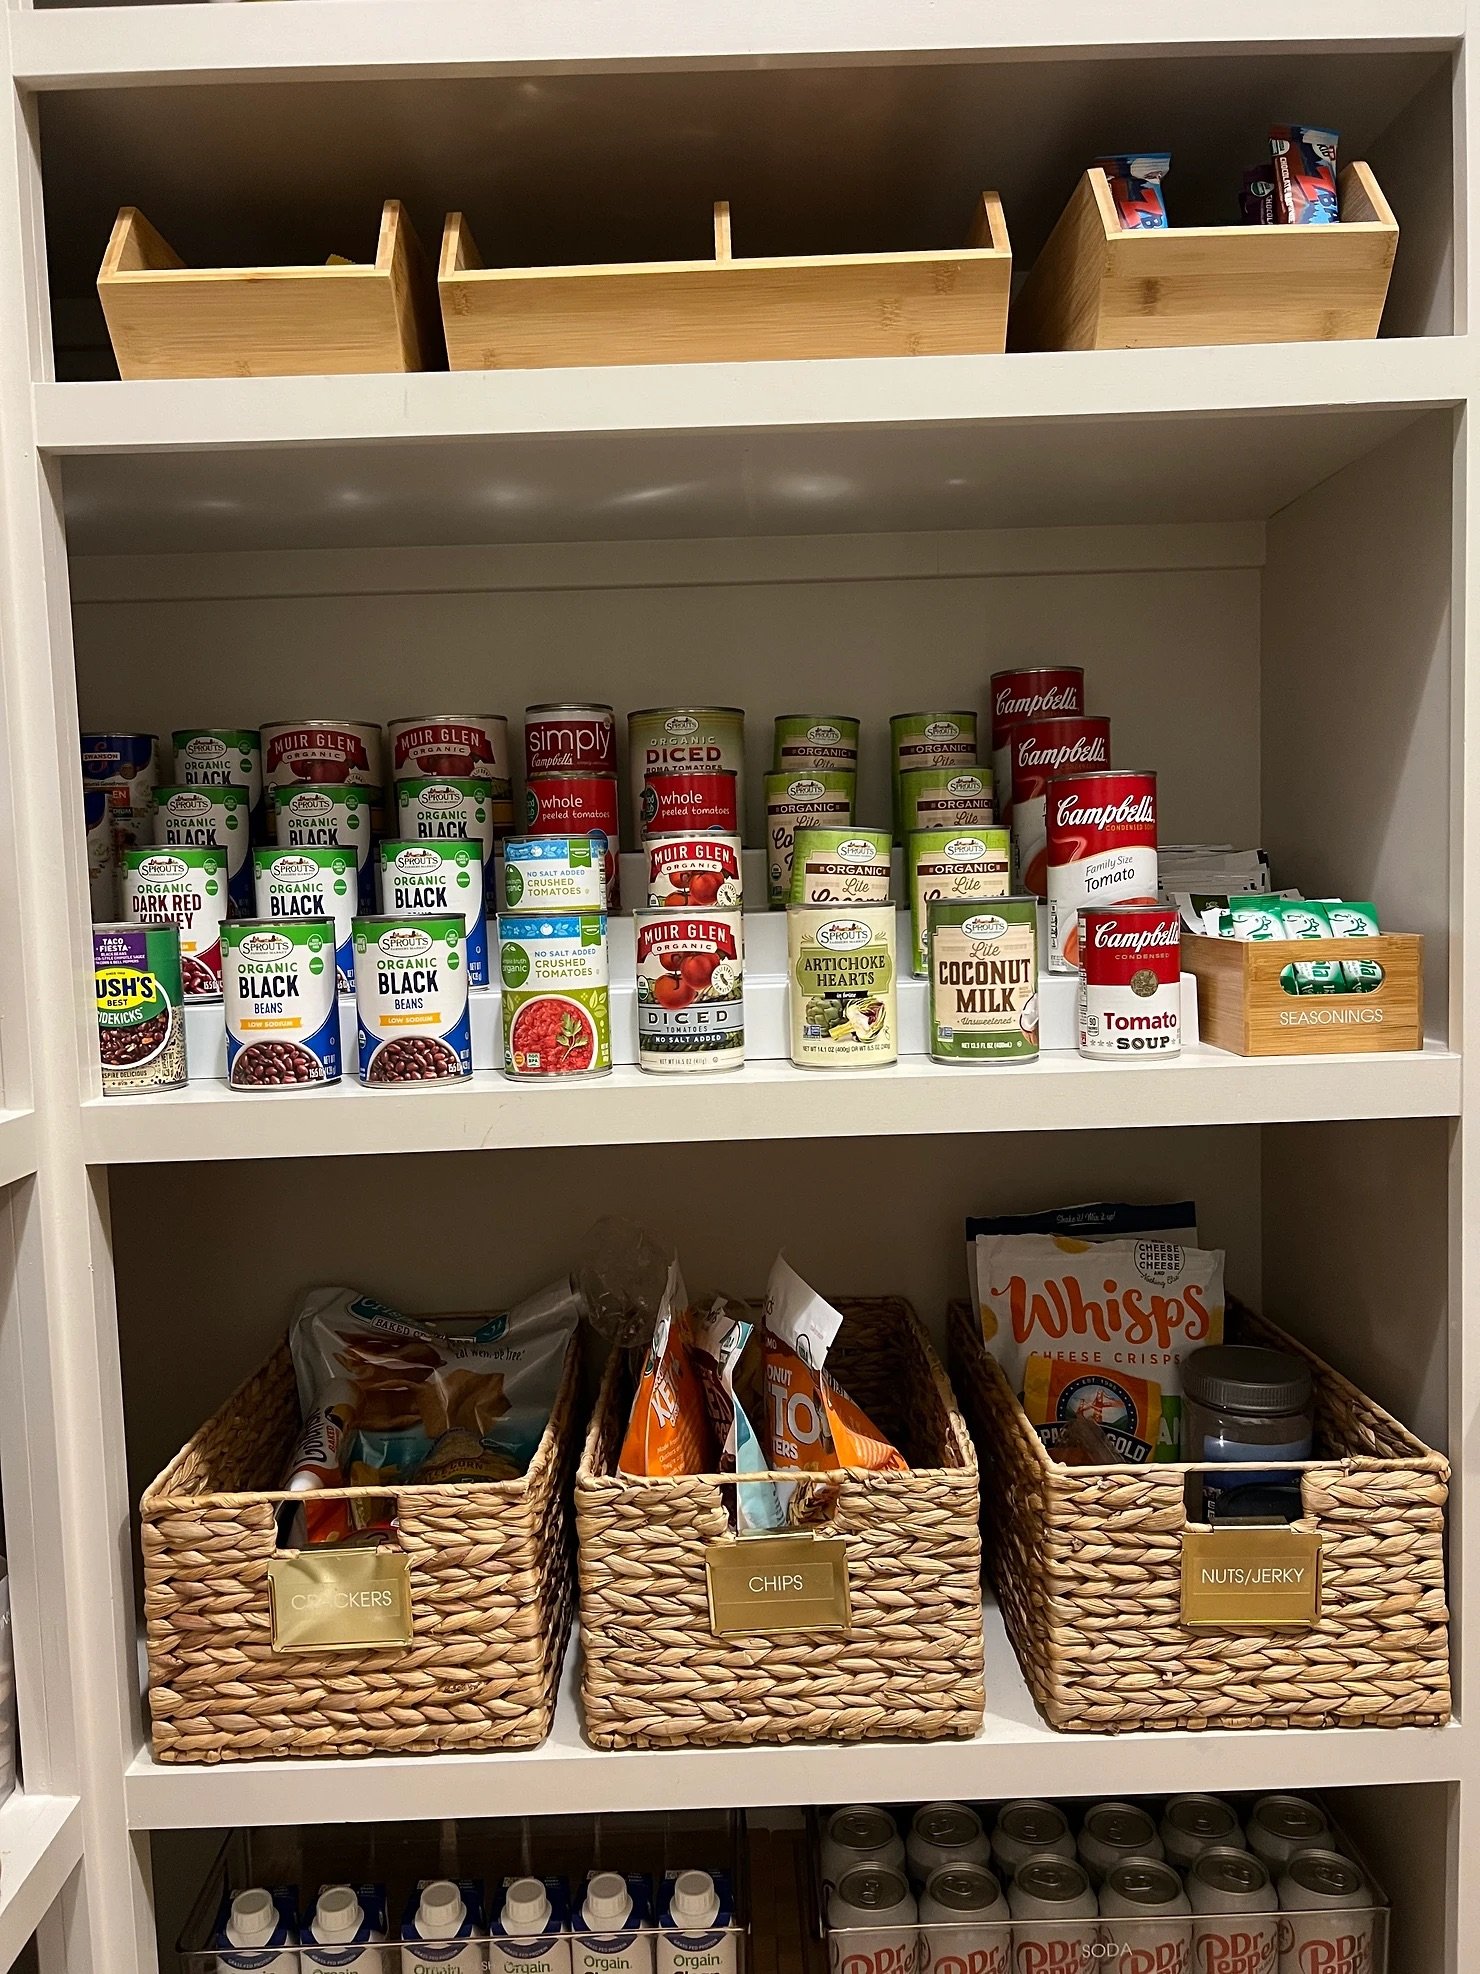
I always recommend using tiered shelf riser for cans, because it allows you to see all of your canned food AND rotate it by using the oldest first.
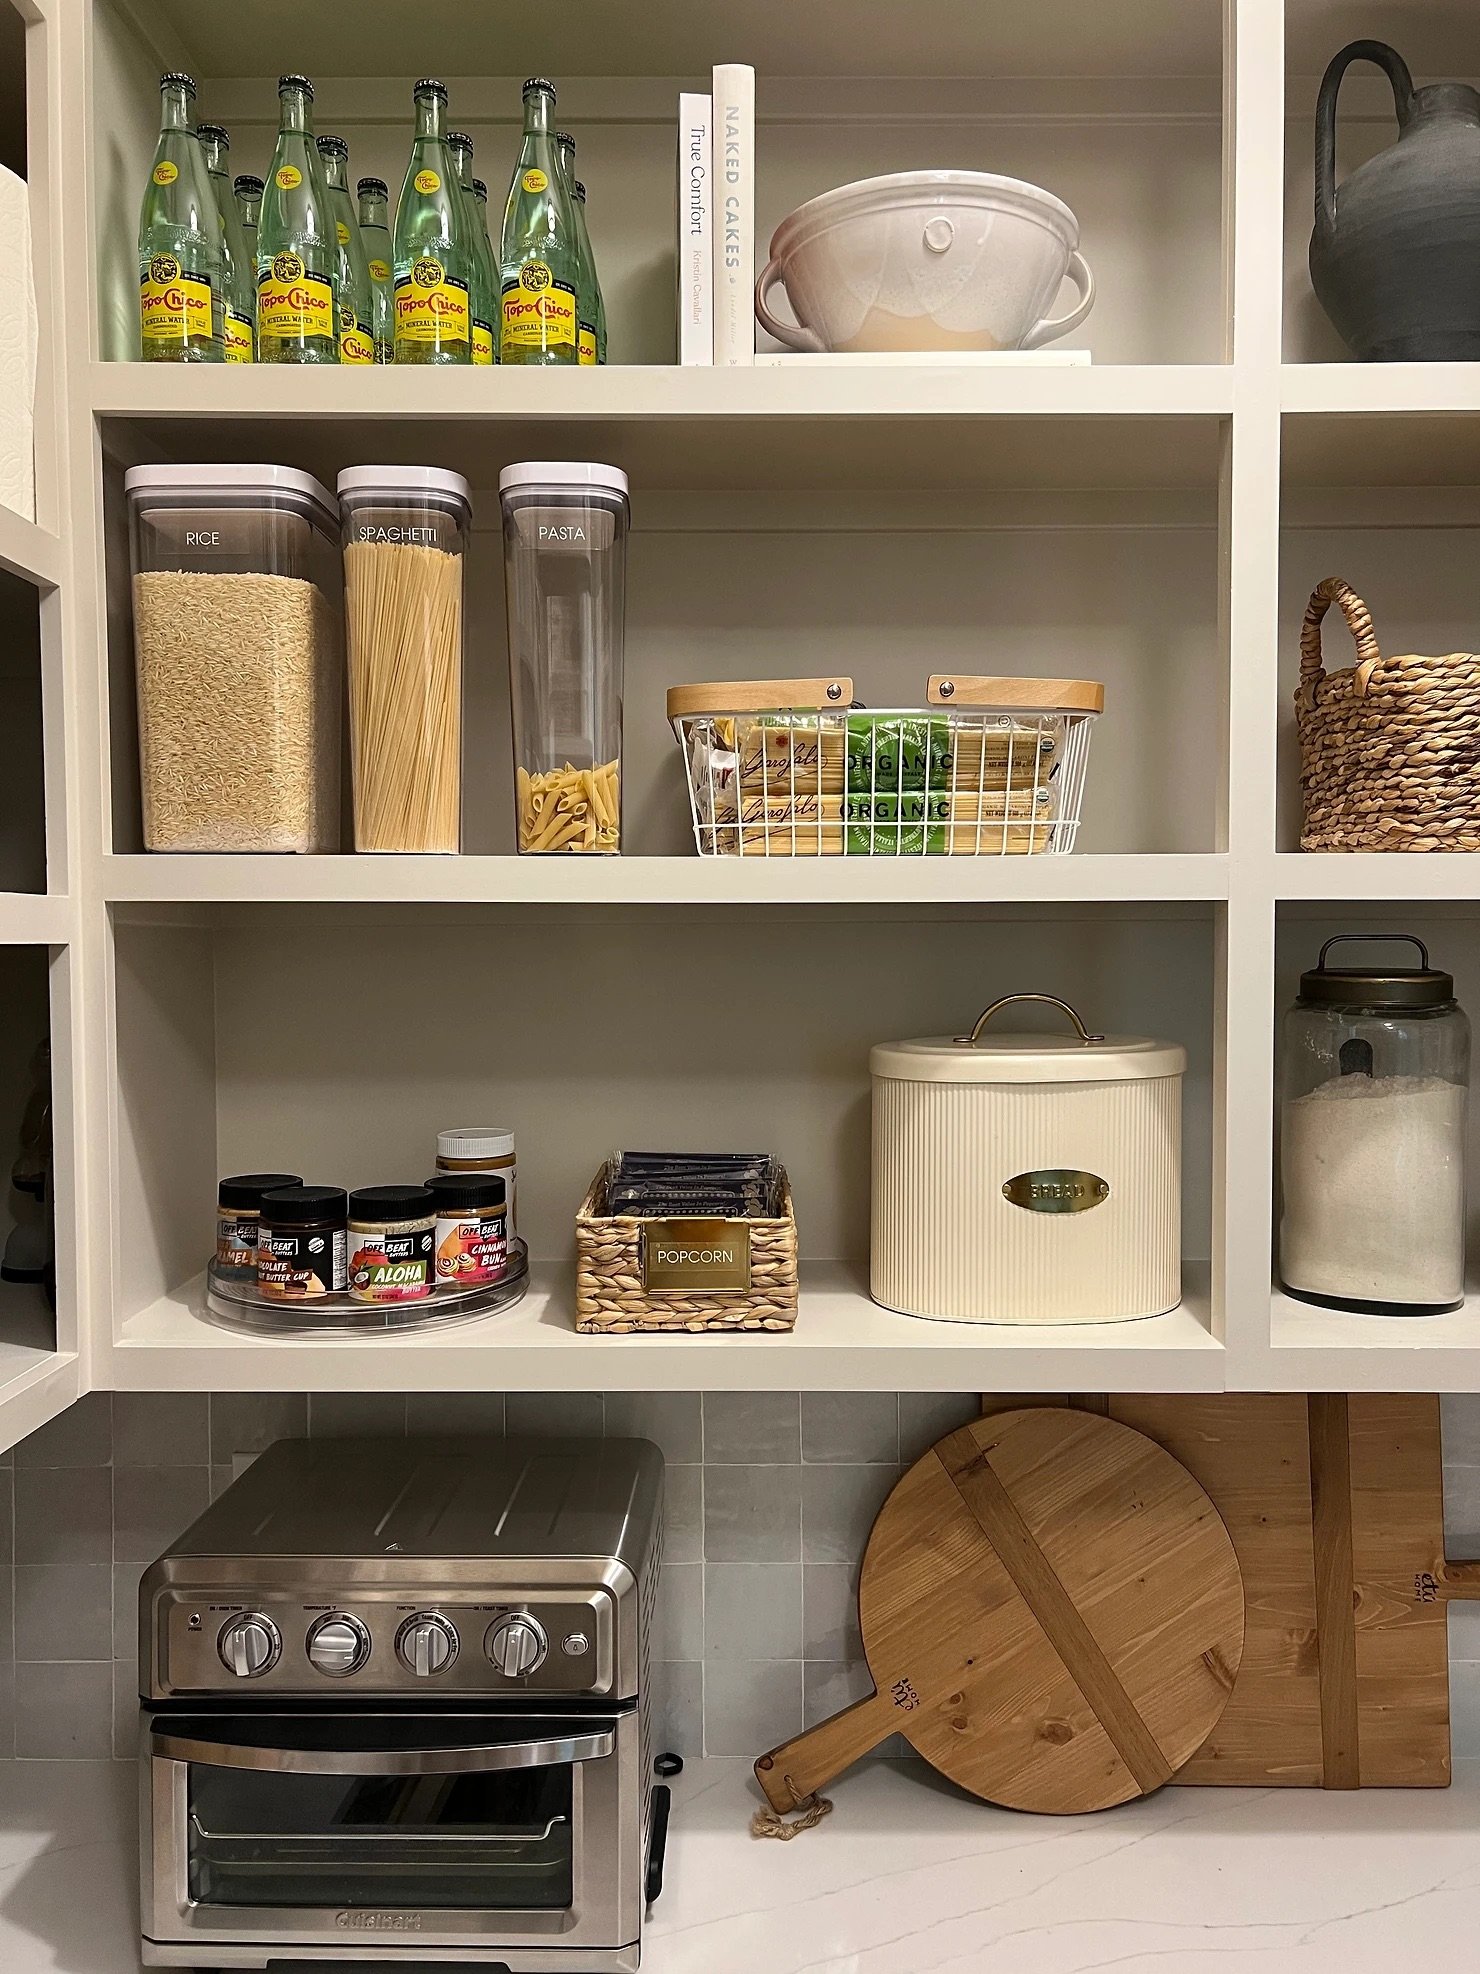
Turntables for hard-to-reach areas like corners and upper shelves. (We like to place round items on the turntables such as: condiments, oils and vinegars, syrups and spreads, sauces and dressings, etc.)
Bins and baskets that coordinate with each other and the aesthetic of your home will add to the beauty AND help your pantry to function better. They allow you to create zones for categories such as snacks / breakfast / dinner / baking / etc.
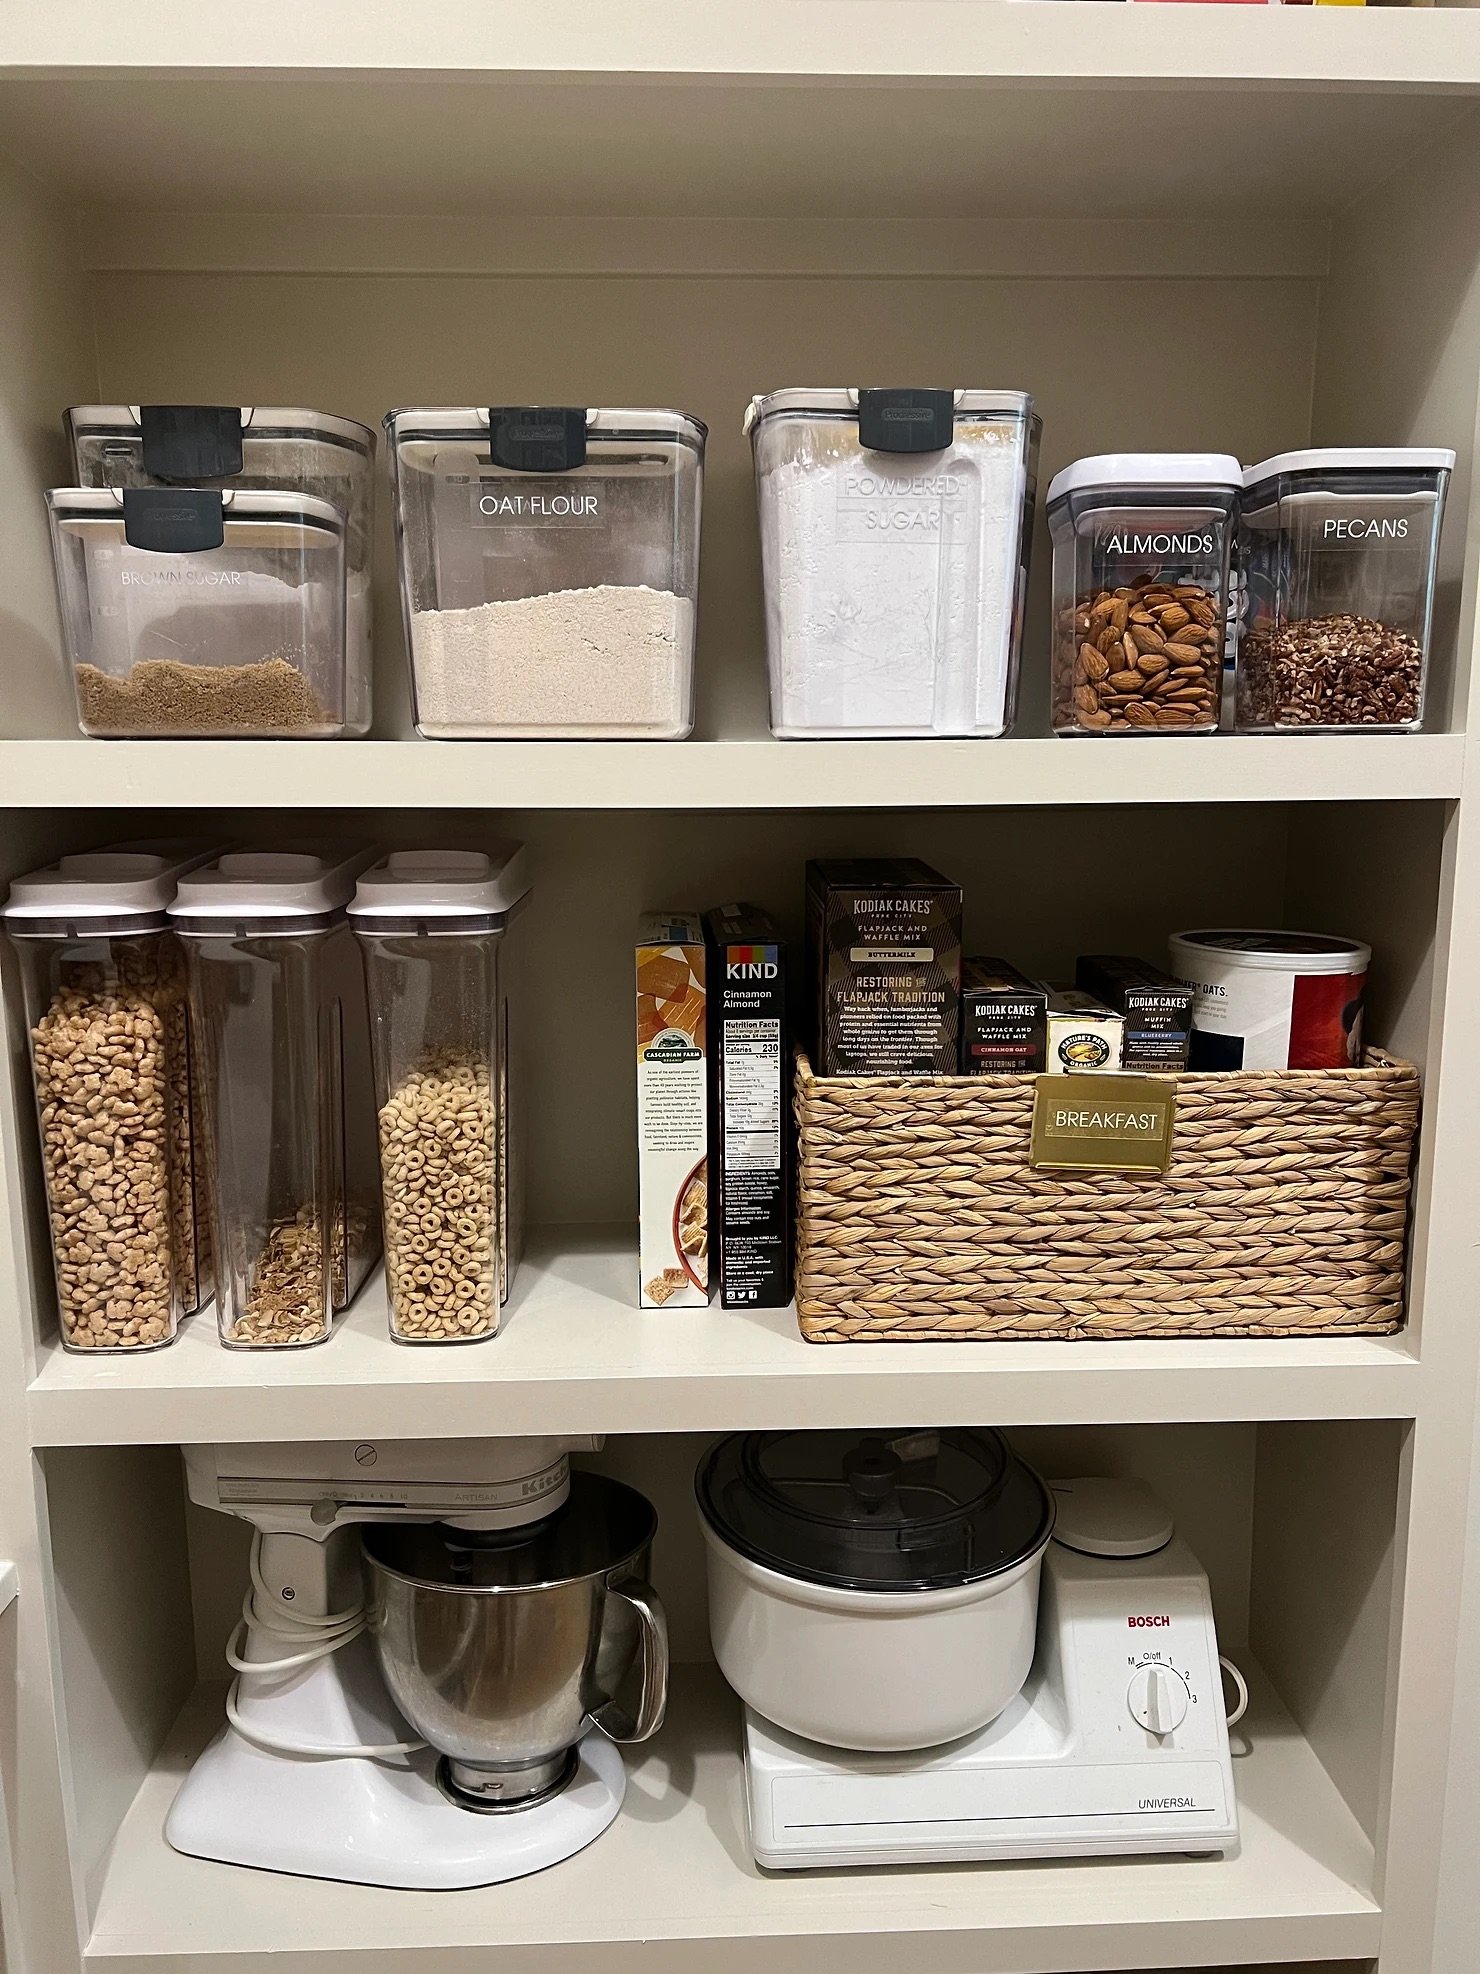
Some people like to decant their dry goods, and some people do not. I recommend to only use air-tight containers for things like flour, sugar, cereal, snacks (and more) if you will keep up the habit of decanting and then throwing away cardboard boxes. A few advantages to doing this… are that air tight containers can line up and stack well, making better use of your space. Also, you can always see how much of something you have left. It’s not fun to store a few empty boxes of cereal in your pantry and then find out they’re empty at breakfast time!
We like to keep a container of clothespins in every pantry that we organize… they are so helpful in keeping packages pinned shut – which helps the food to last longer AND look better!
Step stools are a great thing to keep in pantries, as they create an entire extra shelf that is reachable, for both adults and kids!
Should you label your containers/bins?
There is only one instance where I would say to NOT use a label in your pantry, and this is it: If you decant your cereal and/or snacks into air tight containers, but you always buy different kinds… you don’t need to put a label on that container! Sometimes, our clients like to have a generic label such as “cereal” or “snacks” (rather than being too specific), because everything else in their pantry has a label and they want to keep consistency.
Even if YOU think it is obvious where the breakfast items belong (for example), there could very likely be someone in your family that doesn’t think the same way you do! Labels make it easy to see where things belong.
How do you maintain the organization after a grocery store trip?
First of all, I would get as many family members involved in this activity as possible, even if it takes several weeks for each person to have the opportunity to be involved. Once you teach everyone these tips, the maintenance won’t fall on you alone!
When it comes to using canned food: I suggest pulling all your cans to the front of the shelf, after you’ve moved one to use for dinner (for example). When you bring new groceries home, place those new cans behind the others so that the older cans get used first.
For items like granola bars that come in a cardboard box, take them out of the cardboard box and throw that away before putting the granola bars away!
If you decant your dry goods, do this (I’ll use cereal as an example): assuming the older cereal is almost gone, pour what’s left of it into a bowl. Then open up your new cereal box and pour it’s contents into the air-tight cereal container. Leave enough room at the top to pour the older cereal back in from the bowl, and it will get eaten first! If your new cereal box has any left inside, take the plastic bag out of the cardboard, and recycle that cardboard box! Pinch the plastic cereal bag closed with a clothespin, and add it to your “refill” basket.
Tips for a smaller pantry:
The tips for organizing and maintaining a pantry are the same no matter what the size the room or closet is. The only difference really, is the amount of food you are able to store inside. With less space to store food, you will probably have to buy less food and shop more often, than someone with a larger pantry. If you like to buy in bulk or when things are on sale: base your meal planning around what you have in your pantry, rather than making a meal plan and then looking to see what you need to buy at the store and add to what’s already in there.
Use the space on the back of your door, if possible! There are organizing products made to hang on the back of doors, that give you a surprisingly good amount of extra storage space.
Use the depth of your shelves by looking for bins that use up the entire depth. Use bins that stack if necessary, to use up the entire height between shelves. Use shelf risers on your top shelf (if there’s room), to create an extra “shelf” for more bins to sit on.
What is the last and final step?
First things first: take your family on a tour of the pantry, explaining the systems and zones that you set up. Kids LOVE learning about this and get excited about doing their part to keep it up.
Your shopping habits play a big part in keeping the pantry organized. Do not buy more than you have room for. Although we like to designate space for “extras” or “refills” in the pantries that we organize, there is still a limit to what can fit in those zones.
Every 4-6 months, set aside an hour or two to go through your pantry and clean out expired food, crumbs that have accumulated, food that nobody likes, and anything out of place. I just did this with my own pantry and it felt like new again! The systems I have set up made it quick and easy to clean out and I know you’ll find the same thing to be true in your own home!
Thanks Shalae and team for all of your hard work in making my pantry so amazing and organized! Now can you come back to do the rest of my house :)
Products used in my pantry: Bread Storage | White Baskets | Air Tight Containers | Lazy Susan | Woven Baskets | Can Risers | Metal Top Canisters


